Preparing for a FAA checkride is a pivotal moment in any pilot’s journey. Whether you’re pursuing a Private Pilot Certificate, Instrument Rating, or Commercial Certificate, the practical test is a rigorous assessment of your aeronautical knowledge, decision-making, and flight proficiency. A well-organized and thorough checklist not only boosts your confidence but also ensures that nothing stands between you and a successful outcome.
Before your checkride, you must meticulously gather documents, verify eligibility, and organize your materials for easy access and clarity. Let’s explore the complete checkride checklist — what to bring, how to organize it, and why each item matters.
Medical Certification and Identification: Verifying Pilot Fitness
A fundamental requirement for any FAA practical test is proving that you’re medically fit to fly. You must present either a valid Third-Class Medical Certificate or meet BasicMed requirements. For BasicMed, this includes a completed medical education course (MEC) within the last 24 months and a valid U.S. driver’s license.
Failure to bring either of these will immediately disqualify you from beginning the checkride. Be sure that the documents are current and printed, even if available digitally, as some examiners prefer physical copies for verification.
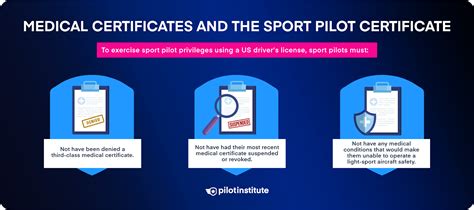
Equally important is having a photo and signature ID, such as a driver’s license or passport. For non-U.S. citizens, it’s essential to confirm document acceptability in advance with your Designated Pilot Examiner (DPE) or checkride official.
Knowledge Test Results: Proof of Readiness
If your rating requires a written knowledge exam, bring proof of passing it. This can be:
- A hardcopy test report from an FAA-approved testing center.
- An electronic copy (PDF or screenshot).
- A reproduction such as a scanned print.
Be sure the document includes your full name, test code, date, and passing score. An examiner will verify this before proceeding to the oral portion.
FAA Form 8710-1 or IACRA Application
Most applicants today use the Integrated Airman Certification and Rating Application (IACRA) system. It’s imperative that your IACRA application is submitted, reviewed by your instructor, and electronically signed. Record your FTN (FAA Tracking Number) and Application ID, and have them ready to provide to your examiner.
For legacy systems or exceptions, a manually completed FAA Form 8710-1 may be used. Ensure all fields are accurate, signed where necessary, and reviewed beforehand.
Pilot Certificate: Bring What You Hold
You must carry your current pilot certificate, whether it’s a student pilot, private, or instrument rating. The FAA requires that you present the physical certificate during the checkride. Temporary certificates printed from IACRA are acceptable if within the valid period.
Logbooks and Aeronautical Experience Documentation
Your logbook is more than a record of your flight hours — it’s your evidence of eligibility. Ensure that it clearly shows you meet the aeronautical experience requirements for the certificate or rating you’re pursuing. This includes:
- Dual instruction and solo flights
- Night flying (if applicable)
- Cross-country time
- Instrument training
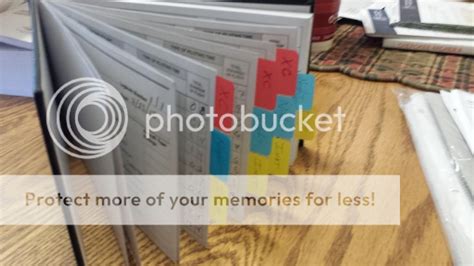
To streamline the process, use sticky tabs to mark key entries and endorsements. This saves valuable time during examiner review and demonstrates your preparedness.
Instructor Endorsements: Ensuring Compliance
The most overlooked failure point on checkrides is missing instructor endorsements. Cross-reference the requirements in Advisory Circular (AC) 61-65H, which outlines the necessary wording and endorsement types. Examples include:
- Solo cross-country approval
- Pre-checkride preparation
- 90-day solo renewal (for students)
Work closely with your Certified Flight Instructor (CFI) to verify that nothing has been omitted.
Aircraft Documentation: Legal and Airworthy
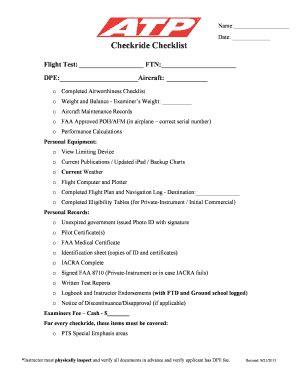
Prior to the oral exam, you’ll be asked to demonstrate that your aircraft is legally airworthy. Prepare and review the following:
- Airworthiness Certificate
- Registration
- Operating Limitations (POH/AFM)
- Weight and Balance data
These are often referred to using the acronym AROW. Additionally, ensure that the aircraft maintenance records are complete and available for inspection. This includes:
- Annual inspection status
- 100-hour inspection (if required)
- Transponder, ELT, and pitot-static system checks
If any documents are missing or expired, your checkride will not proceed.
Pre-Assigned “Homework”: Planning and Calculations
Some examiners require applicants to prepare specific assignments before the checkride. This may include:
- A cross-country flight plan using current charts
- A detailed Weight and Balance calculation for the flight
- Fuel, performance, and weather analysis
This exercise not only demonstrates your planning proficiency but sets the tone for the oral exam.
Checkride Fees and Examiner Communication
Most Designated Pilot Examiners charge a checkride fee, which varies by location and rating level. Confirm the amount during scheduling and know the acceptable form of payment. Also, maintain communication with your examiner in the days leading up to your checkride — confirm location, time, and any last-minute requirements.
Personal Equipment: Be Ready, Be Professional
You’re expected to bring all equipment necessary to conduct a safe and professional flight. This includes:
- Current sectional and terminal area charts
- Chart Supplement (formerly A/FD)
- Aeronautical Information Manual (AIM)
- FAR/AIM or digital reference
- E6B flight computer (manual or electronic)
- Plotter for navigation planning
- View-limiting device (foggles or hood for instrument maneuvers)
- POH/AFM for the aircraft
- Notebook and pen
A small snack and bottle of water can also make a long test day more comfortable.
Mindset and Professionalism: What Can’t Be Packed
Beyond documents and tools, you must bring a composed and proactive mindset. Dress professionally, communicate clearly, and treat the examiner with respect. Confidence born from preparation often makes the difference between passing and falling short.
During the oral exam, don’t rush. If you’re unsure of a regulation or concept, demonstrate resourcefulness by knowing where to find the answer — this reflects real-world pilot judgment.
In the flight portion, fly the airplane like you’ve trained: precise, safe, and within standards. Focus on aeronautical decision-making, risk management, and controlled execution.
Final Tips: Checkride Success Is in the Details
Many checkride failures stem from overlooked details, not lack of skill. To ensure you’re ready:
- Have a checkride folder or binder with printed documents and digital backups.
- Walk through a mock checkride with your instructor.
- Check TFRs, NOTAMs, and airport conditions the night before.
- Ensure the aircraft is fueled, clean, and ready.
Becoming a certified pilot is a remarkable achievement. With a well-prepared checkride checklist, you eliminate surprises and present yourself as a competent, professional aviator. From your first handshake with the examiner to the final maneuver in the air, preparation is your greatest asset. Don’t leave anything to chance — organize, verify, and fly like the pilot you’ve trained to become.


