Power issues with wall outlets are a common concern among homeowners, and testing an outlet for power—or confirming it’s safely de-energized—requires precision, the right tools, and careful technique. Whether you’re troubleshooting a non-functional outlet or preparing to replace one, it is crucial to ensure that the power is truly off before beginning any electrical work. In shared dwellings or multi-unit buildings, this can be especially challenging. We’ll walk through the best methods to test if an outlet has power, including non-contact voltage testers, plug-in testers, and multimeters, and provide step-by-step instructions tailored for safety and accuracy.
Understanding the Problem: When an Outlet Shows No Power
An outlet may appear dead for several reasons—blown internal contacts, tripped breakers, or disconnected wiring are all possibilities. But just because a device doesn’t work when plugged in doesn’t mean the outlet is completely without voltage. Residual or live wiring behind the outlet could still pose a hazard, especially if the issue lies in one terminal or if a loose connection is intermittently passing current.
To prevent injury or fatal electrical shock, the first rule is: never assume an outlet is dead just because it isn’t working.
Step 1: Begin with a Known-Working Tester
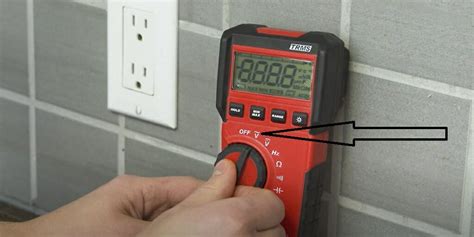
Before testing the suspect outlet, verify your tools are functioning. If using a non-contact voltage tester (NCVT), test it on a known live outlet first. A faulty tool can give you a false sense of security.
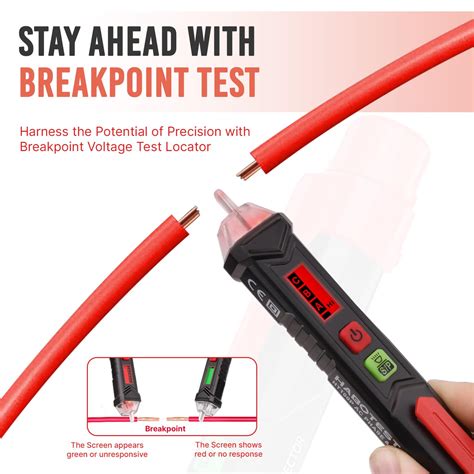
- Non-contact testers: These are safe and simple. They detect the presence of voltage without touching any conductors. However, they can give false positives or negatives if the outlet is damaged or poorly grounded.
- Plug-in outlet testers: These tools are great for confirming basic outlet issues like reversed polarity or open neutrals, but they require the outlet to pass current, which may not help in dead-outlet scenarios.
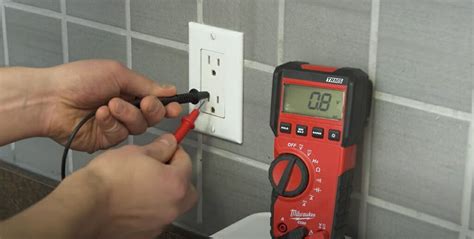
- Digital multimeters (DMMs): These offer the most precise voltage readings, but they require physical contact with the outlet’s terminals or internal wiring.
Step 2: Remove the Outlet Cover Carefully
If the outlet is not delivering power and you’re uncertain whether the associated breaker is off, carefully unscrew the outlet cover plate. Use extreme caution and do not touch any metal parts inside until voltage is confirmed to be absent.
From here, gently pull the outlet forward to expose the wire terminals. Do not touch the bare wires or terminal screws with your hands—use insulated tools only. You’ll now be able to access the points necessary to use a multimeter or contact tester.
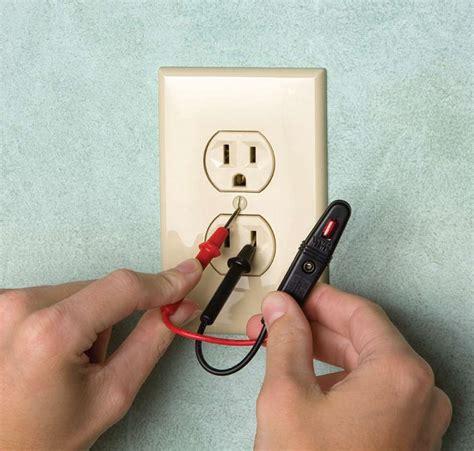
Step 3: Use a Multimeter to Check the Terminals Directly
Set your multimeter to AC voltage mode. Touch one probe to the hot (usually black or red) screw and the other to the neutral (white) screw on the outlet. If the reading is 120V (in North America) or your regional standard, the circuit is live.
- If it reads 0V, the outlet may not be receiving power—but this doesn’t confirm the wire behind the terminal is de-energized.
- To be thorough, test hot to ground and neutral to ground as well. These tests can reveal grounding issues or partial voltage scenarios.
Step 4: Flip Breakers One by One, Retest Each Time
If the circuit breaker layout is unlabeled or unreliable, you may need to flip breakers individually to find the correct one. After flipping a breaker, test the outlet wires again with your multimeter.
This is where the multimeter becomes indispensable. Each time you toggle a breaker, recheck voltage across hot and neutral. Once you find the breaker that results in a 0V reading across all configurations (hot-neutral, hot-ground, neutral-ground), it’s safe to assume the outlet is de-energized.
Pro Tip:
If neighboring outlets go dark after flipping a specific breaker, there’s a strong chance they’re on the same circuit. Use that insight to speed up the identification process—but never rely on assumption alone.
Step 5: Confirm with a Non-Contact Tester One Final Time
Even after a 0V multimeter reading, double-check with your non-contact voltage tester. Hover it over the wire insulation behind the outlet and over the terminal screws. If there is no audible or visual signal, it likely means the power is off.
But if your tester still chirps near the wires, even with a 0V reading on the multimeter, it could indicate capacitive coupling from nearby energized wires. That’s why the multimeter should be your primary tool, and the NCVT a secondary confirmatory device.
Why Plug-in Testers Might Mislead You
Many homeowners purchase plug-in testers thinking they’re a one-stop solution. While useful for diagnosing wiring errors like open grounds or reversed hot/neutral wires, they don’t help much with a dead outlet, since the tester needs voltage to deliver any diagnostic information.
If the outlet is blown internally or has poor internal contact, a plug-in tester might not light up, even if dangerous voltage is still present on the wiring behind it.
Advanced Tools: Circuit Breaker Finders
If you need to identify the correct breaker without repeatedly toggling switches, a circuit breaker finder can save time and effort. These tools work in pairs—a transmitter plugs into the outlet and sends a signal, while the receiver detects the correct breaker in the panel.
However, they depend on the outlet being at least partially functional, which makes them less ideal for situations where the outlet is fully dead. In such cases, direct wire testing with a multimeter remains superior.
Extreme Caution: Working on Live Outlets Is Risky
Some experienced DIYers claim they’ve replaced outlets while they were still live, using insulated screwdrivers and pliers. While technically possible, it’s a dangerous practice that should be avoided. Even 120V household current can cause serious injury, burns, or worse—especially if your hands are wet or the space is tight.
Always isolate the circuit and test with multiple tools before proceeding with any electrical work. The cost of caution is always lower than the cost of a mistake.
Summary: Tools and Techniques for Reliable Outlet Testing
Here’s a concise guide to the most reliable testing methods:
- Non-contact voltage tester: Safe first check, but susceptible to interference.
- Digital multimeter: Most accurate for determining true voltage status.
- Plug-in tester: Good for diagnosing wiring errors, not for dead outlets.
- Breaker finder: Ideal for labeled circuits or live outlets.
To test if an outlet has power—or to confirm it does not—the most professional and safe workflow is:
- Test your tools on known live sources.
- Use an NCVT as a preliminary check.
- Carefully expose outlet wiring without touching terminals.
- Use a multimeter to test voltage directly on terminals.
- Flip breakers one at a time and repeat the voltage check.
- Confirm power is off using both multimeter and NCVT.
By following these techniques, you can confidently determine the status of any electrical outlet—ensuring not only your safety, but also the integrity of your home’s electrical system. Electrical troubleshooting demands care, methodical thinking, and the proper instruments. When in doubt, consult a licensed electrician rather than risk injury.
Electrical work is unforgiving—precision and caution must always come first.


")


