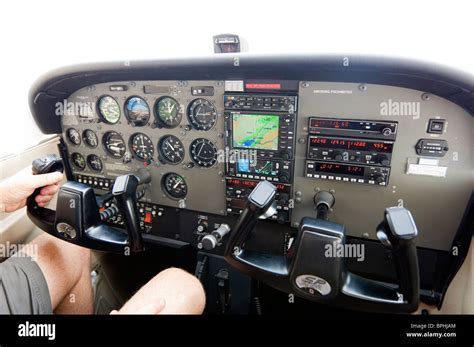
Effective radio communication is a cornerstone of safe flight operations, particularly in small aircraft like the Cessna 172. Radios are critical for coordinating with air traffic control, communicating with other pilots, and accessing essential weather information. Ensuring your aircraft’s radio is functioning correctly before takeoff is a fundamental safety check, and there are several methods to do this without necessarily contacting air traffic control (ATC) or ground services directly. This article explores the best practices for verifying the operational status of a Cessna 172 radio, including transmission and reception checks.
Key Radio Components in a Cessna 172
Before diving into testing procedures, it’s crucial to understand the main components involved in radio communication within the Cessna 172:
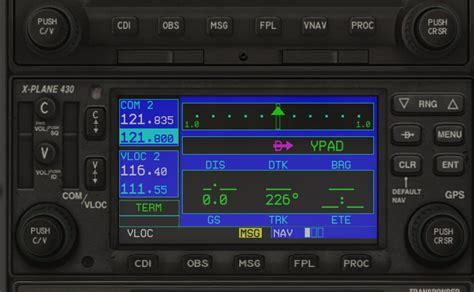
- Transceiver (COM Radio): Handles both transmission and reception of voice communication.
- Push-to-Talk (PTT) Switch: Allows pilots to transmit over the selected frequency.
- Antenna System: Facilitates the transmission and reception of radio waves.
- Headset and Microphone: Critical for clear voice communication.
- Squelch Control: Reduces background noise and helps maintain clear reception.
- Audio Panel (if installed): Manages multiple audio inputs and outputs.
Understanding these components helps pilots troubleshoot effectively if issues arise during pre-flight radio checks.
Testing Radio Reception without External Communication
One of the simplest methods to verify your radio’s reception capabilities without directly contacting ATC is by tuning into an ATIS (Automatic Terminal Information Service) or AWOS (Automated Weather Observing System) frequency. These frequencies broadcast continuous weather and airport information, making them ideal for basic reception tests. Here’s how to proceed:
- Set the Frequency: Tune the radio to a known ATIS or AWOS frequency for the airport you’re operating from. These frequencies are typically listed in the airport’s directory or on aeronautical charts.
- Monitor Signal Quality: Listen for the clarity and volume of the broadcast. If the audio is clear and without excessive static, your receiver is likely functioning well.
- Adjust Squelch Settings: Override the automatic squelch to ensure the radio can handle weaker signals. This is particularly important if you plan to operate in areas with marginal signal coverage.
Verifying Transmission without Ground Contact
Testing the transmission capability is slightly more challenging without external assistance, as it requires a way to confirm that your signal is being broadcast correctly. However, there are a few practical methods available:
- Handheld Transceiver Test: If you have a handheld airband transceiver, you can perform a direct test. Tune both your aircraft’s radio and the handheld to the same, unused frequency (e.g., the air-to-air frequency 122.75 in the US). Transmit from the aircraft and listen for your own transmission on the handheld. If you can hear yourself clearly, your radio is transmitting correctly.
- Pilot-Controlled Lighting (PCL) Test: Many airports with PCL systems allow pilots to activate runway lights by keying the microphone several times on a specific frequency. If the lights respond to your input, it confirms your transmission capability.
- Internal Communication Check: In aircraft equipped with intercom systems, you can also verify the microphone and headset by attempting to communicate with a right-seat passenger over the radio system, ensuring both sides are transmitting clearly.
Comprehensive Troubleshooting Steps
If you encounter issues during these tests, consider the following troubleshooting steps:
- Check Frequency Settings: Verify that you have selected the correct frequency for the intended service.
- Inspect Antenna Connections: Ensure the antenna is properly secured and free of damage.
- Test PTT Functionality: A faulty or partially engaged PTT switch can prevent proper transmission.
- Assess Headset and Microphone Condition: Damaged or improperly connected headsets can significantly degrade audio quality.
- Battery and Power Supply: Low voltage can severely affect radio performance, particularly in battery-powered systems.
Final In-Flight Checks
Once airborne, you have additional options for verifying radio functionality:
- Call FSS (Flight Service Station) for a quick radio check if the frequency is not too congested.
- Test PCL Again to confirm your signal strength over a greater distance.
- Listen to 121.5 MHz (the emergency guard frequency) to verify your receiver’s sensitivity, as this channel often has intermittent traffic.
Maintaining a reliable radio system is crucial for safety, and regular pre-flight checks ensure your equipment is ready for every flight. With a few straightforward steps, you can confidently verify both transmission and reception without the need for a direct ATC or ground response, keeping your communication lines clear and your flights secure.


